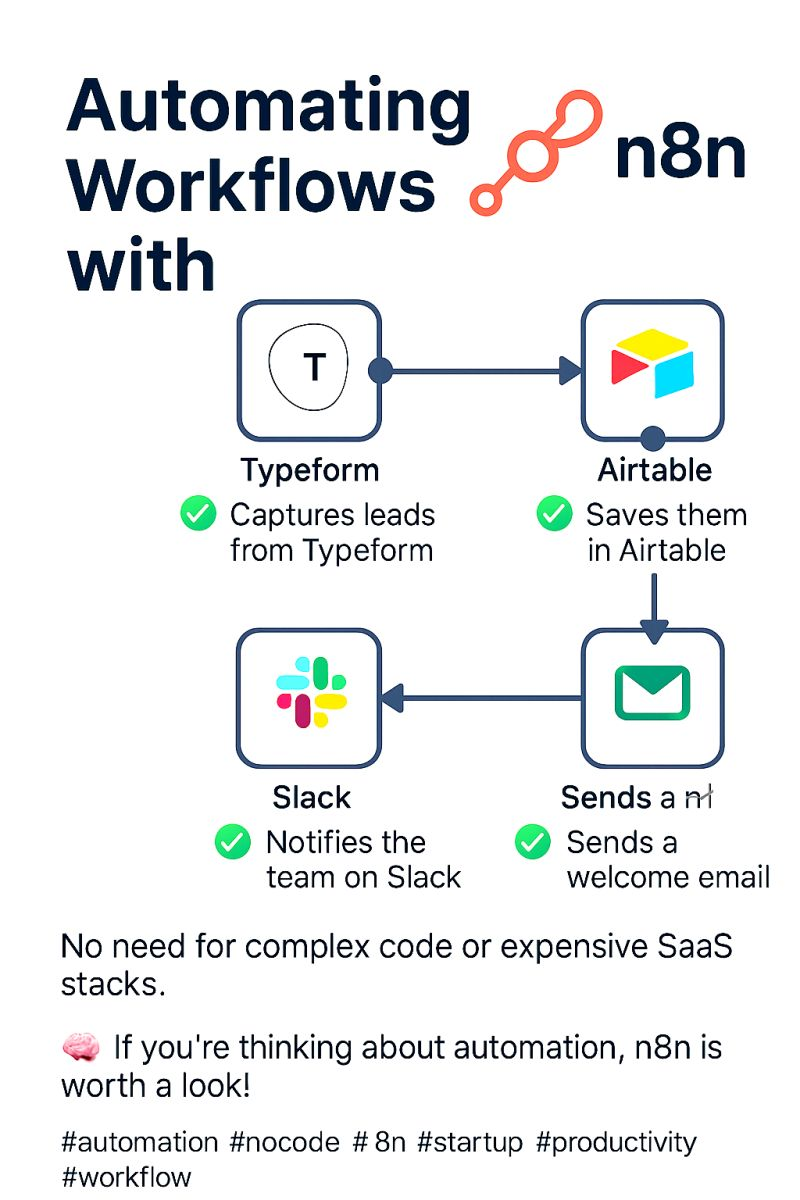
Manually copying lead information from forms into your database and notifying your team wastes hours. In this step‑by‑step tutorial, you'll build a no‑code automation that captures client intake data (Typeform), stores it in a database (Airtable), and sends a real‑time notification (Slack).
What You'll Need (All Free Tiers)
- Typeform – to create your client intake form.
- Airtable – to store client data (free plan works).
- Slack – to receive notifications (free plan).
- Zapier or Make – to connect the three apps (free tiers available).
Step 1 – Create Your Typeform
- Sign up for a free Typeform account.
- Create a new form (e.g., "Client Intake").
- Add fields: Name, Email, Project Type, Budget, Deadline, Message.
- Publish the form and copy its URL.
Step 2 – Set Up Your Airtable Base
- Create a new base in Airtable called "Client Leads".
- Add a table named "Leads" with columns: Name (text), Email (email), Project Type (single select), Budget (number), Deadline (date), Message (long text), Status (single select: New, Contacted, Won, Lost).
- Take note of your Base ID and Table ID (you'll need them for the automation).
Step 3 – Build the Automation (Using Make)
Why Make? It's more generous on the free tier (1,000 ops/month) and visual. You can also use Zapier if you prefer.
- Log in to Make and create a new scenario.
- Add the Typeform module: choose "Watch new entries". Connect your Typeform account and select your form.
- Add the Airtable module: choose "Create a record". Connect Airtable, select your base and table. Map the Typeform fields to Airtable columns.
- Add the Slack module: choose "Send a message to a channel". Connect Slack, select the channel (e.g., #client-leads). Compose a message using data from Typeform/Airtable (e.g., "New lead: [Name], Budget: [Budget]").
- Set the scenario to run at a regular interval (e.g., every 5 minutes) or use webhooks for real‑time.
- Save and start the scenario.
Step 4 – Test Your Automation
Submit a test entry through your Typeform. Within a few minutes (or instantly if using webhooks), you'll see:
- A new row in your Airtable "Leads" table.
- A Slack message in your chosen channel.
Customization Ideas
- Add a filter: Only create Airtable record if budget > $500.
- Send an email: Use Gmail module to send a welcome email to the lead.
- Create a Trello card: For leads that need follow‑up.
- Add a delay: Wait 1 day, then send a reminder to contact the lead.
Pricing & Limitations
- Typeform free – 10 responses/month, 1 form. Upgrade for more.
- Airtable free – 1,200 records/base. Enough for most freelancers.
- Slack free – 10k messages, 1‑to‑1 calls. Plenty.
- Make free – 1,000 operations/month, 2 scenarios. Ideal for testing.
Once your business grows, you can upgrade any of these tools (or move to self‑hosted alternatives).
Conclusion – Automate and Focus on High‑Value Work
This automation alone can save you 2‑3 hours per week by eliminating manual data entry and ensuring no lead is missed. Replicate the same pattern for other workflows: job applications, course signups, support tickets, etc.
Try the tools for free:
Typeform free →
Airtable free →
Slack free →
Make free →